Email marketing is still the most widely used and powerful marketing tool for businesses.
That's why in WHMCS 8.0, we've put a lot of effort into improving the email capabilities of WHMCS to provide better email deliverability and enhance the email marketing capabilities available to you.
We recently posted a blog about the new Email Delivery Providers integrations available in WHMCS 8.0 which allow you to use dedicated email delivery services. Today, I'm going to take a deep dive into the Email Campaign Tool which gives you greater control, power and flexibility for sending emails and mailshots to segments of your customer base.
So what's new?
The Email Campaign Tool is an evolution of the Mass Mail feature and introduces the following new features and functionality:
- Campaigns - allowing you to create and track the campaigns you send
- Drafts - allowing you to iteratively build email campaigns with the ability to save and come back at any time
- Scheduling - allowing you to schedule emails to be sent on a specific date/time in the future
- Improved Previews - giving you a more accurate preview of what your email will look like when delivered to your customers inboxes
- Batch Sending - sending is now handled via cron, meaning you no longer have to wait for your bulk emails to send, and emails are processed in batches to better deal with throttling and sending restrictions
- Email Sending Reports - allowing you to easily track any sending failures, as well as have historic insights into the campaigns you've sent
The best way to show you everything that's new is with a walkthrough of the new Email Campaign Tool, so here goes.
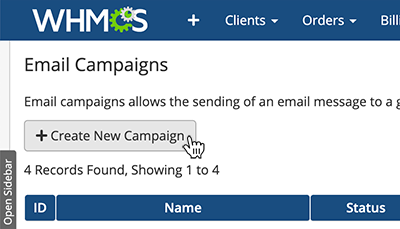
Once you're running WHMCS 8.0 or later, you'll find the new Email Campaigns tool under Utilities. To create your first campaign, navigate there and click the 'Create New Campaign' button.
First, you'll be asked to give your new campaign a name. This is something only you will see, and is separate from the subject of the email you send, so you can use a name that helps you identify the purpose and audience of the email.

Next you choose the Type of email you wish to send. The type of email determines the merge fields and data you can include in your email message, and the criteria you can use to filter and define the segment of customers you want to send to. Here's an overview of the different types and what they mean:
| Type | Available Merge Data | Filter/Segmentation Criteria |
|---|---|---|
| General | Client Profile | client group, country, language and status |
| Product/Service | Client Proifle & Service Information | all general options + Product/Services, Status and Hosted Server |
| Addon | Client Profile & Addon Information | all general options + Addon Name & Status |
| Domain | Client Profile & Domain Information | all general options + Domain Status |
Once you've selected a type, define your criteria, and then click Continue. Next up is the message composition step. We've made a number of layout improvements here as well as improvements to the message preview, giving you a more accurate representation of the email you are about to send.
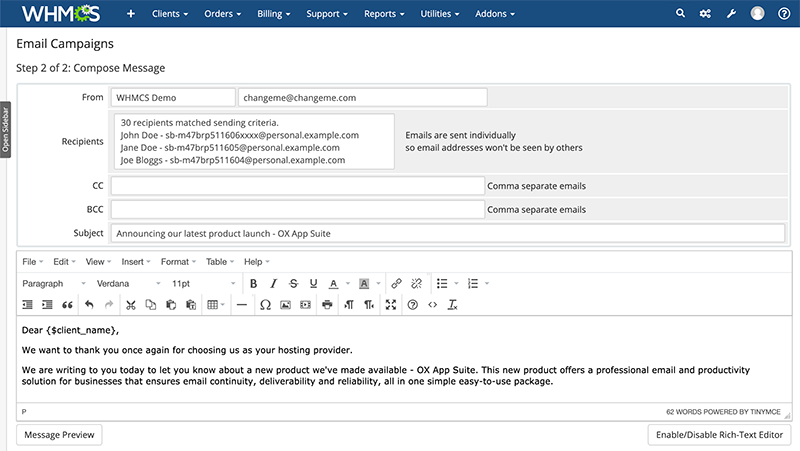
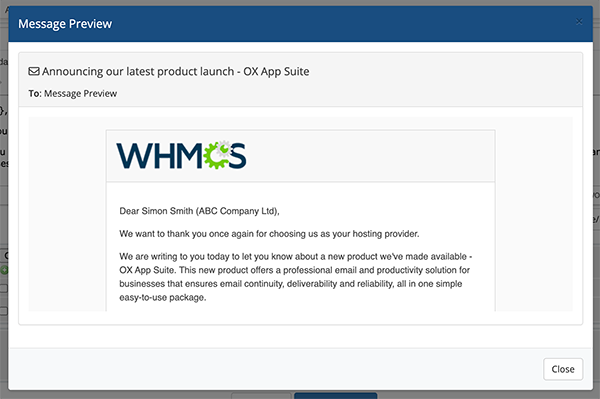
We've also added some new options including the ability to schedule a send time, and save as a draft.
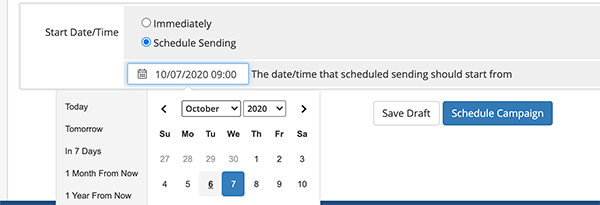
Drafts allow you to save your email campaign at any time and return later to continue to build out your email message and other settings.
Scheduling allows you to schedule a future day/time that you want your email campaign to begin sending, useful if you want to schedule a notice around planned maintenance, a time specific offer, and in many other use cases.
Once you're happy with your email, hit the 'Schedule Campaign' button to complete the process.
This will move your email campaign to the sending queue, and begin the process of sending it out - in batches - to your selected recipients. You can return to the Email Campaigns page at any time to check the progress of the sending of your campaign.

If during the sending process you wish to edit your campaign, you'll need to first pause it, and can then edit and make changes - but of course, once a campaign has started sending, those changes will only affect future recipients.
Clicking the 'View Sending Report' option provides you with even greater insights into the sending status of a campaign, with the ability to see any sending failure error messages, and the ability to retry sending to those failed recipients.
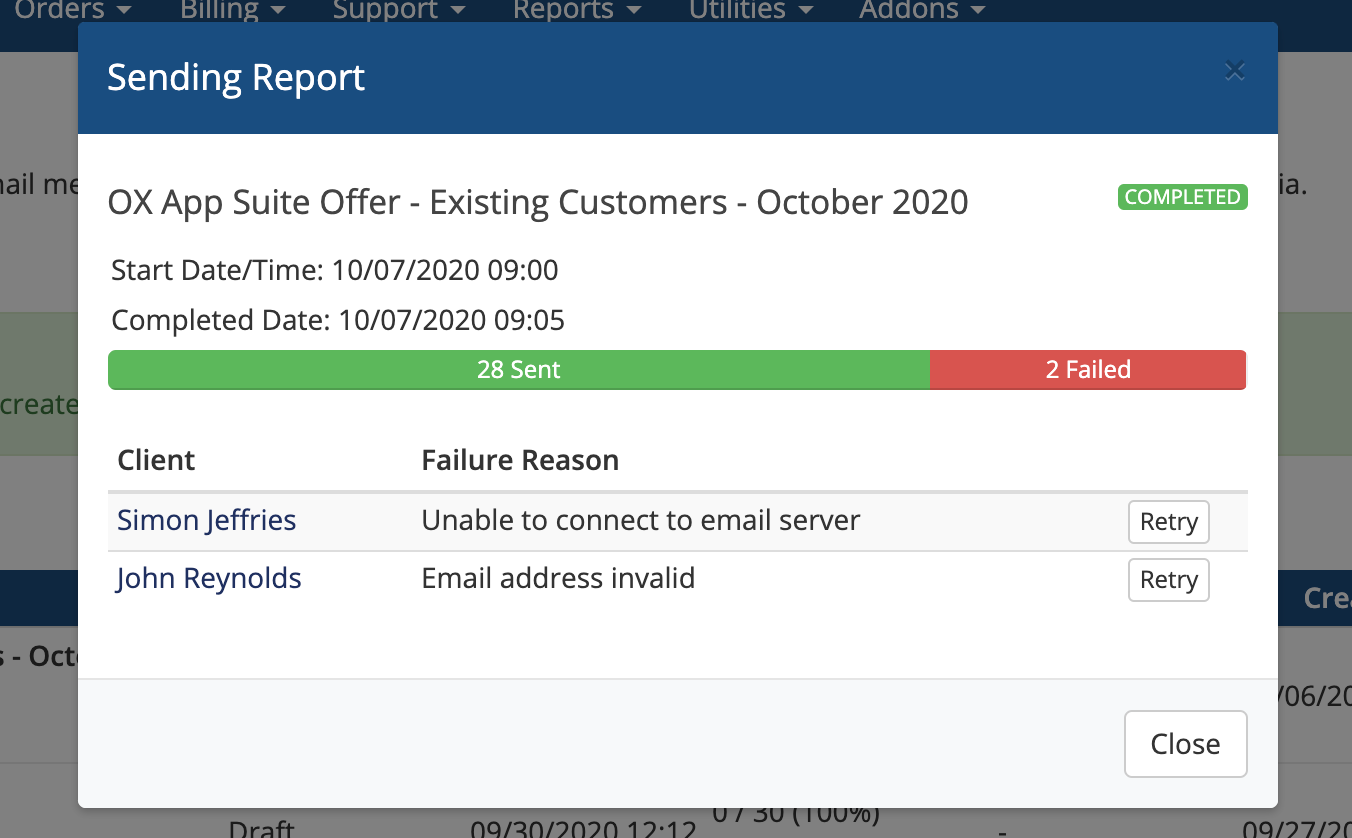
With these changes, we hope the Mass Mail and Emailing features in WHMCS can become much more useful to you, and help you to do more with email marketing to your customer base.
If you have any questions about the new features or functionality, or suggestions for other things you'd like to see added in future, we invite you to post a message in the comments below.
Thanks for reading!
PS. For more information about WHMCS 8.0 and the other new features, be sure to take a look at What's New in WHMCS 8.0
