Updating a business-critical piece of software like WHMCS can be intimidating, but at WHMCS, we put a lot of effort into ensuring updating WHMCS is as safe and straightforward as possible. We take a great deal of care to reduce obstacles wherever possible, for example by avoiding template changes in maintenance updates wherever possible, and maintaining backwards compatibility with features and functionality for as long as possible. In this post I'll share my top tips for making sure a WHMCS update goes smoothly.
I've split these tips into four main sections;
- Preparation - Things to consider and prepare for before the update
- Testing - Things to be aware of and test prior to updating
- Execution - Tips for executing the update process on your production system
- Validation - And finally some recommended validation checks for once the update is complete
Preparation
As with many things, preparation is key, so start with some preparatory reading. It's important to check that the requirements for the new version are met. The latest system requirements are always available in our documentation.
If you intend to use the Automatic Updater, there are some additional system requirements for that tool that are worth checking too. Most importantly, ensure there's enough free disk space, and that PHP open_basedir contains the entire WHMCS docroot.
The last bit of reading I'd recommend is to get familiar with the Release Notes. Release Notes often contain important information about new features and changes, as well as deprecation and removal notices, and of course, any template changes.
The next consideration is for custom modules and third party extensions, including hooks. Each should be checked for compatibility with the new version.
Review the WHMCS Marketplace listing, which will be updated by individual vendors when support for a new version is added. If yours is not listed in the Marketplace, contact the vendors directly. An update may be required to these extensions or modules.

Now let's consider templates. First you should always ensure that all your template customisations are contained within their own directory, as any changes you make to the default templates will likely be overwritten.
The Release Notes contain a Template Changes section with links to our template repos on Github. These repos and the links we provide allow you to see visual diffs of the template changes between two versions making it easy to see the changes you need to apply to custom templates.
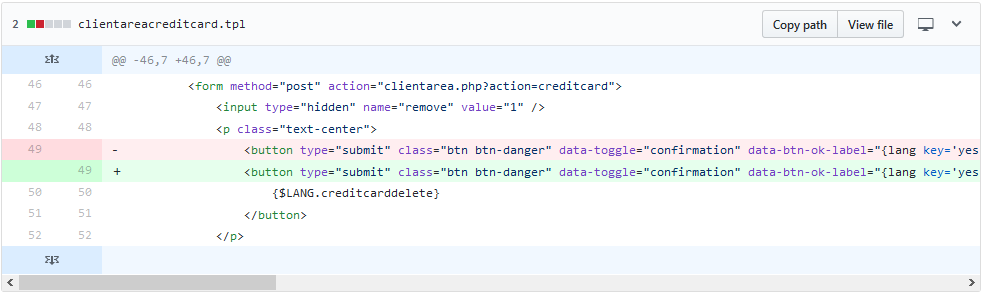
By making our templates available on GitHub, you can leverage the power of Git to make the process of template updating faster and reduce the potential for human error. Our Customising templates...the easy way blog post has a step by step walkthrough to help you get started.
A number of customisations can also be made with override files. Override files allow you to customise parts of the products in a way that is safely preserved through the update process. For this reason we recommend making the following customisations via override files. Click on an item below to learn more.
- Language text and phrasing customisations
- WHOIS Server additions and changes
- Country and Calling Codes modifications
Testing
I always recommend creating an exact replica of your installation for testing purposes. This is useful not only for testing out updates, but also testing out new features and functionality, as well as customisations you make. All direct licence holders are entitled to a free second licence for private testing and development purposes. If you don't already have one, you can request a development licence by contacting our friendly Customer Service team. To create your test installation, create a full copy of the files and database. Remember to update the configuration.php file in your copy to use your development license key and new database credentials. You can then use this installation to test the update process, third party addons/extensions and templates on a separate development installation first.
Often, you will want to ensure that the duplicate installation can't send emails or actually charge your customers, so I recommend performing the following steps:
- Disable email sending - Do this by navigating to Setup > General Settings > Mail tab and select the "SMTP" Mail Type. Leave the SMTP credentials field blank so that SMTP will fail.
- Set payment gateways to test mode - Do this by navigating to Setup > Payments > Payment Gateways and checking the test mode boxes
- Set domain registrars to test mode - Do this by navigating to Setup > Products/Services > Domain Registrars
- Disconnect from live servers - Do this by navigating to Setup > Products/Services > Servers and invalidating the username and password credentials for your servers.
- The Admin Area - If some pages look a little weird; a hard refresh of browser or clearing browser cache usually does the trick.
- The Client Area - Login as a client and navigate to the service details and domain details pages. Try submitting a ticket (remember, when masquerading as a client you won't receive a new ticket notification email).
- The Order Process - Place a new order. In the admin area, mark it as paid, to ensure provisioning is triggering as expected.
- Automation Tasks - At the daily automation settings "time of day" look for the Cron Job Activity Report email to confirm the automation tasks completed successfully
Execution
The first step in executing a successful update is to take backups. Typically we see people use a web based tool such as phpMyAdmin - but you can also use mysqldump from the command line - to backup the WHMCS MySQL database. Also take a copy of the entire WHMCS files directory using your preferred method. This way, in the unlikely event there is a problem, you can quickly revert. The update process will need to create and alter tables in the MySQL database. So ensure the MySQL User has all available permissions granted for the duration of the update process.
I recommend using the Automatic Updater as my experience is that users have the most success when using it. Using the Automatic Updater will download, validate, extract the new files and update the database - all in one click.
To do this, navigate to Utilities > Update WHMCS and click the Update Now button. If the update was only recently released you may need to click the Check for Updates button first.

The manual option is always available for power users. If you do decide to update this way, here are some tips:
- Always upload the full version distro zip file and extract directly on the server. Uploading individual files can take longer and it's easier for files to be missed.
- Ensure that all files upload, extract and overwrite successfully. Permissions issues or lack of disk space are a frequent cause of update failures we see in support.
mysqldump -u [username] -p [databaseName] > whmcsdatabasebackup-$(date +%F).sqlmkdir /home/whmcs/public_html/upgradestaging && cd /home/whmcs/public_html/upgradestaging
unzip /path/to/whmcs_v770_full.zip
cp /home/example/public_html/whmcs/configuration.php /home/example/public_html/upgradestaging/whmcs/
php -f home/example/public_html/upgradestaging/whmcs/install/bin/installer.php
rm -rf /home/example/public_html/upgradestaging/whmcs/install/
mv /home/example/public_html/whmcs /home/example/public_html/whmcs_backup_xxxx-xx-xx/
mv /home/example/public_html/upgradestaging/whmcs/ /home/example/public_html/whmcs/
rm -rf /home/example/public_html/upgradestaging
Validation
When the update success message is displayed, you're nearly there. The final step is to check everything is working as expected. 
As before in the testing phase, we recommend testing key areas of functionality such as can you login as a client, can you view product details, can you submit a support ticket and can you place a new order.
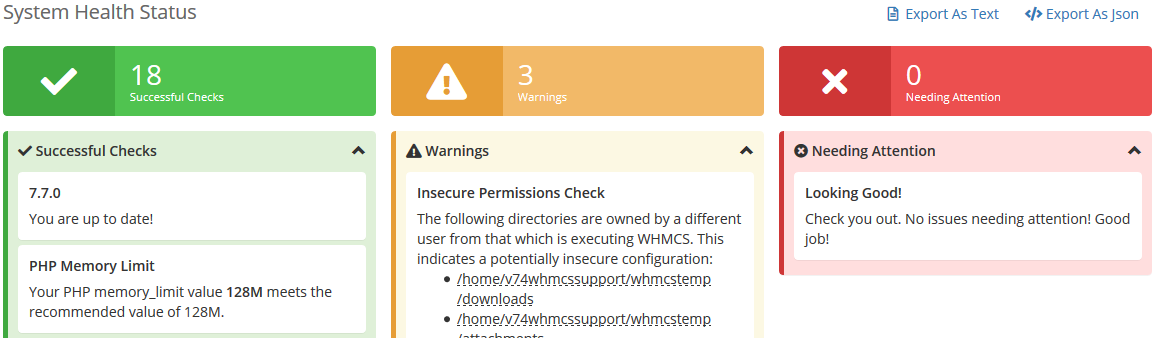
I also recommend monitoring the Help > System Health Status page for any attention items in the following 24 hours.
If you follow the process outlined above, your chances for success when updating WHMCS are far higher. What are your top tips for a smooth WHMCS update? Let us know in the comments below.