You can't afford to lose your data. Whether due to system failure, human error, or any other reason, data loss can spell the end for a business. So the importance of having good backups goes without saying.
cPanel Backups is a new feature in WHMCS 7.3 that enables web hosts running WHMCS in a cPanel environment to schedule automated daily full file and database backups of your WHMCS installation.
Why cPanel? WHMCS itself runs unprivileged and is restricted by system and file level access permissions as well as, and more commonly the cause of problems, PHP memory and execution time limits. cPanel helps because of its escalated privilege allowing us to provide a much more reliable backup solution.
Upgrade to WHMCS 7.3 and follow the guide below to get started today.
How To Guide
1. Begin by logging in to your WHMCS admin area and then navigate to Setup > Other > Database Backups.
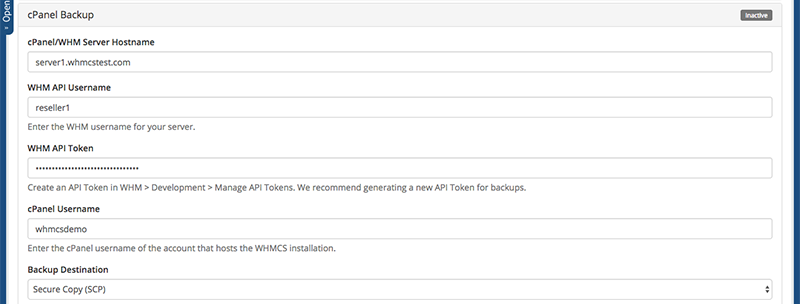
2. Select cPanel Backup.

3. Enter your WHM Server Hostname, Username and API Token. If you don't have an API Token, you can create one inside WHM by navigating to Development > Manage API Tokens. We recommend generating a new API Token solely for backups.
4. Enter the username of the cpanel account that is home to your WHMCS installation. In our case it is 'whmcsdemo'.
5. Choose the Backup Destination. For optimum backup redundancy, we recommend choosing a Backup Destination that is on a remote server. Secure Copy (SCP) is the recommended choice here.
If you already have another server you can use, simply enter the backup destination hostname, port, username, password and destination directory where requested. Then skip to step 9. If you don't, read on to learn how you can create a DigitalOcean droplet for backups.
How To: Provision a DigitalOcean Droplet for Backups
Get 20GB Storage with a DigitalOcean Droplet for just $5/month. Perfect for backups. Plus get your first 2 months free when you signup via this link.
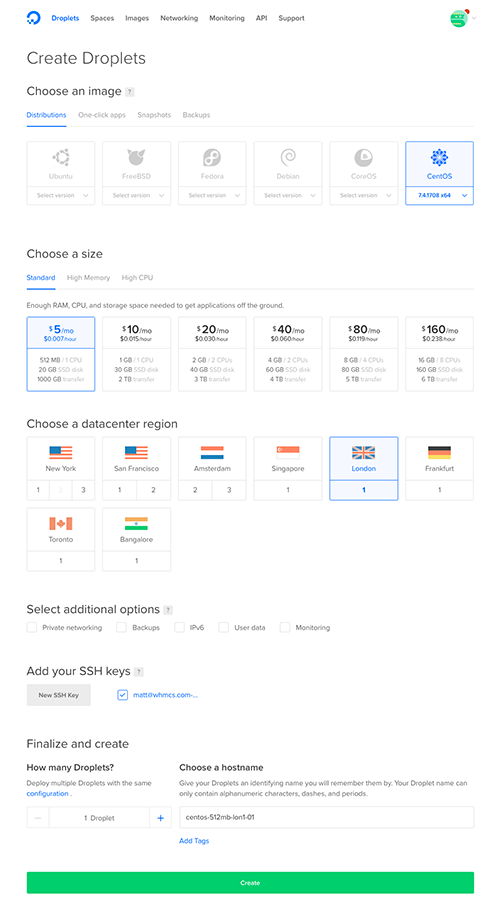
6. Signup/login to your DigitalOcean account. Select Create Droplet, and choose your desired distribution and location. I've opted for CentOS in London.
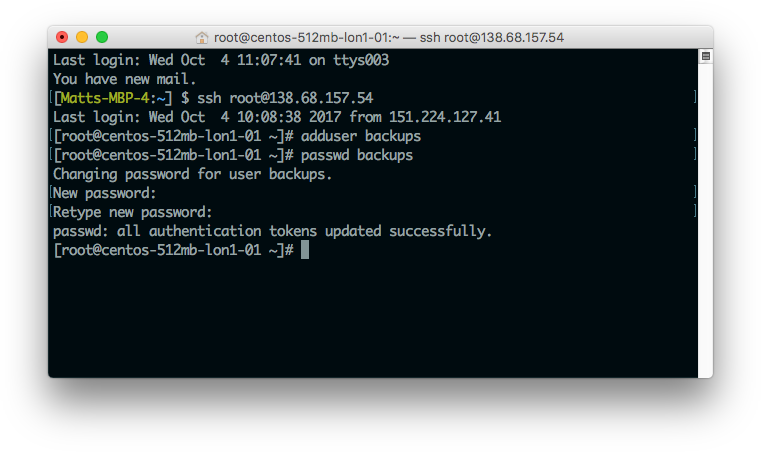
7. Once it's created, login using the server's public IP address.
[COLOR="#696969"]$ ssh root@SERVER_IP_ADDRESS[/COLOR]
Complete the login process by accepting the warning about host authenticity, if it appears, then providing your root authentication (password or private key).
IMPORTANT NOTE: When you first create a new server, there are a number of steps you should take to enforce a base level of security. For the purposes of this tutorial, I'm going to assume you've already done this but if not, here's a great getting started guide that covers some of the most important steps you should take: https://www.digitalocean.com/community/tutorials/initial-server-setup-with-centos-7
8. Next, I'm going to create a user for my backups to use. The following commands will create a user and set a password for a user named 'backups':
[COLOR="#696969"]$ adduser backups
$ passwd backups[/COLOR]
At this point I have everything I need to configure cPanel Backups within WHMCS.
9. Now switch back to WHMCS and enter the server IP, backups user, password, port and desired directory. The final requirement is to provide an email address. This email address will be used to notify you of backup status.
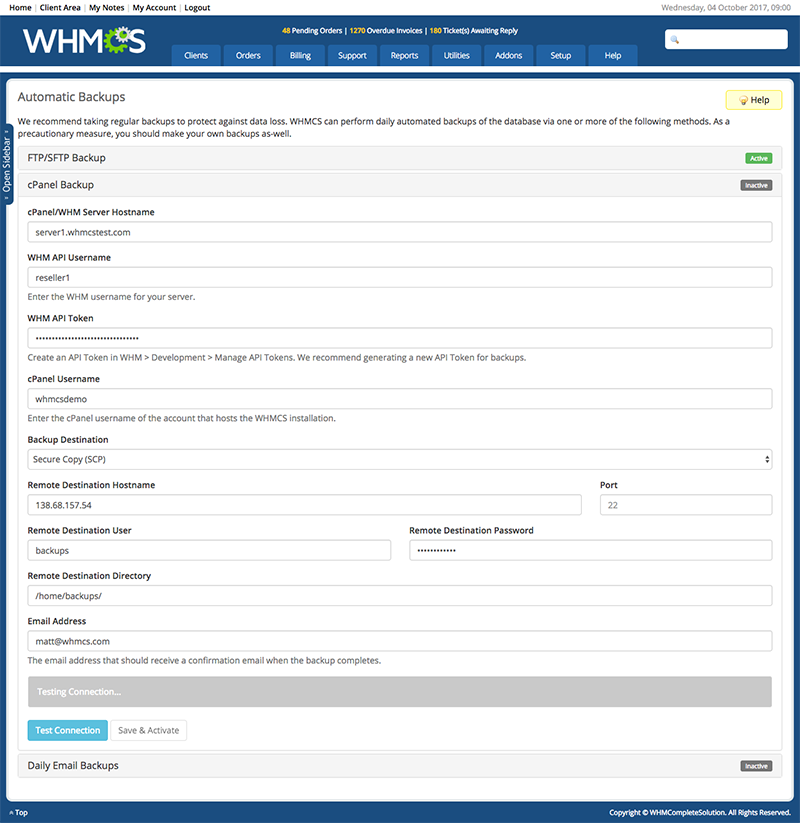
10. You're now ready to hit the "Test Connection" button. This will validate the connection to cPanel and ensure the API Token is working. Note: You must complete a successful test before you can save your backup settings.
11. Providing the test completes successfully, the "Save & Activate" button will become active. Click this button to complete the setup process.
Congratulations! Daily automated backups are now configured.
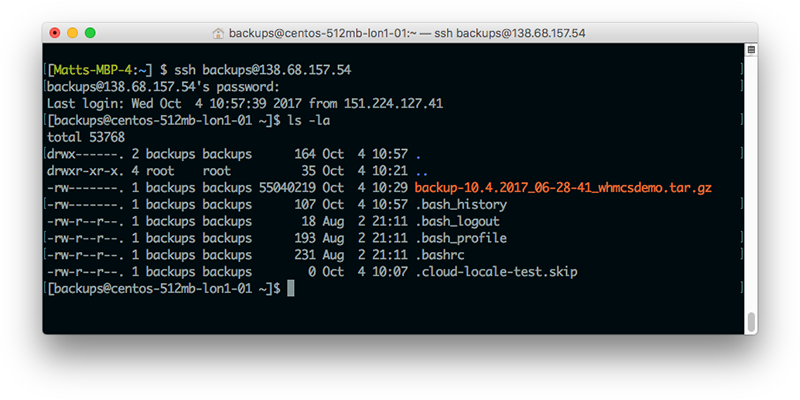
After the next daily WHMCS cron run, login to your backups server again to verify the backup was completed and stored successfully. You should see a date and timestamped file like the one shown below in orange.